01/07/2014

HOMEMADE BOUNTY BARS


I was never mad about coconut, not to mind  bounty bars, those things disgusted me. Over the past few months though, coconut has taken over. I've gone from hating the taste and texture to craving it in all forms. So when I spotted this recipe over here, I knew I had to give it a go, and they did not disappoint. These beauties have shot up to my number one favourite healthy, guilt-free treat. Next up on the list? Coconut coffee. Oh yeah.

15/06/2014

SUGARLESS BROWNIES


                                                                                                           I had a serious hankering for some homemade chocolate brownies, so to satisfy my cravings I concocted a healthier recipe by substituting most of the ingredients for healthier options. I could have gone one step further and used coconut oil instead of butter, but there's only so much coconut oil a girl can take. The ingredients may be a little on the pricier side of things, but these bad boys tasted no different from the original double-the-caloire recipe, so totally worth the money in my book!

03/06/2014

BUTTER-FREE SPONGE CAKE

 Although I'm tempted to just allow the pictures speak for themselves, I had to just take a moment to try and describe the amazing-ness of this cake, if that's even a word. Loaded up with whipped cream and piles of fruit, this baby is melt-in-your-mouth good. The Rachel Allen recipe skipped butter but instead incorporated whipped egg whites and water, making this the most fluffy, light and moist sponge you'll ever try. Have I convinced you yet?  

INGREDIENTS
CAKE
3 eggs, separated
225g caster sugar
90ml room temp water
150g plain flour
1 tsp baking powder

FILLING & TOPPING
250ml cream, whipped
1 punnet of strawberries
1/2 punnet raspberries
1/4 punnet of blueberries
1 passionfruit

METHOD
1. Preheat the oven to 180C (350F). Butter the sides of the sandwich tins (I used two 7.5 inch diameter sandwich tins) and line the bases with greaseproof paper.

2. Place the egg yolks and sugar in a large bowl and beat with an electric mixer for 2 minutes. Pour in the water and whisk for about 10 minutes or until the mixture is firm and creamy. Sift in the flour and baking powder and fold in gently with a spatula.

3. In a separate, spotlessly clean bowl, beat the egg whites until they just hold stiff peaks, then fold them into the flour mixture very gently, again using a spatula. Divide the mixture evenly between the two prepared tins, smooth the surface and bake in the oven for approximately 20 minutes or until just set in the centre.

4. Remove the cakes from the tins by loosening the edges and allow to cool on a wire rack. When completely cooled, smooth about half of the whipped cream across the top of one of the cakes. Cover in fruit and then sandwich the second cake on top, upside down (so that the smoother edge is facing up). Dollop the rest of the cream on top and go to town with the fruit. The more the better!

16/05/2014

RED VELVET CUPCAKES

I don't know about you, but I've always found that cupcakes are way over-hyped. The idea of them? Drool-worthy. But too often I've been disappointed with a chalky, dry cake. That all changed when I tried the red-velvet cupcake. The secret to the melt-in-the-mouth treat? Buttermilk. Tah-dah! Thank me later.

INGREDIENTS
CUPCAKES
30g cocoa powder
3 tbsp red food colouring
1 1/2 tsp vanilla extract
110g butter, softened
170g castor sugar
4 egg yolks
240ml buttermilk
250g plain flour, sifted
1 tsp baking powder

ICING
175g butter, softened
200g icing sugar (add more/less to taste)
1 tsp vanilla extract

METHOD
1. Preheat the oven to 180C. Line two 12 hole cupcake tins with paper cases and set aside.

2. Put the cocoa, food colouring and vanilla extract in a small bowl and mix into a paste. Put the butter and sugar in a large bowl and beat together until soft and creamy. Add the yolks and beat for one more minute. Add the cocoa paste and continue to beat for another minute until it is completely combined and has an even colour. Slowly mix in the buttermilk, followed by the flour and baking powder.

3. Fill each paper case and bake for about 15 minutes or until a toothpick inserted in the centre comes out clean. Allow to cool a little and then transfer onto a wire rack, allowing to cool completely before icing.

4. While the cupcakes cool, make the icing. Beat together the butter (make sure that the butter is soft and at room temperature), icing sugar and vanilla extract to give a thick, creamy consistency. Pop the icing into a piping bag or dip a spoon into hot water and smear the icing on the cupcakes. Crumble up one of the cupcakes and use the crumbs to decorate.


14/05/2014

RAW CACAO & COCONUT TARTS

I can eat nothing but fruit and vegetables for breakfast, lunch and dinner and be perfectly satisfied, but those chocolate cravings never disappear. I struggle to find healthy, yummy desserts so when I happened upon this recipe over on Madeleine Shaw's blog, I couldn't make it fast enough. One small problem; if you don't like the flavour of coconut, step away now, this is not the answer to your prayers. If I'm honest, I wasn't blown away by these when I first tried them. After adding some chopped up strawberries to them, though? Delicious. The best bit? They're so rich that only a couple of bites satisfies all cravings. Win, win.

INGREDIENTS
makes 4 10cm tarts

BASE
75g ground almonds
25g desiccated coconut
25g dates
2 heaped tbsp raw cacao powder
1 tbsp melted coconut oil
a drop of vanilla extract
1 tsp stevia (adjust to taste)

FILLING
100g soaked cashews
15g slightly melted coconut oil
3 tbsp honey
1 tbsp raw cacao paper
1-2 tbsp stevia (adjust to taste)
A drop of water

TOPPING
A handful of chopped pistachios
Raspberries / blueberries / strawberries

METHOD
1. First, grab your tins and oil them up with a little bit of melted coconut oil. Leave the cashews to soak in a bowl of water.

2. Pop the ground almonds, desiccated coconut, dates, cacao powder and stevia into a food processor and blend for a couple of minutes. Add the melted coconut oil slowly and blend until combined completely with the rest of the ingredients. Add the base to the tins gradually, a spoonful at a time. Press the mixture into the tin on the base and along the edges. Make sure to divide the mixture evenly between the desired amount of tins. Put the tins into the fridge to set the base while you make the filling.

3. Blend the soaked cashews, honey, stevia and water in the food processor. Add the cacao and coconut oil and blend until fully combined and creamy. This might take at least a few minutes, and make sure to scrape down the sides and the bottom of the food processor to make sure everything is combined. Add more stevia or honey to taste.

4. Add the filling to the tins with a spoon or spatula. Sprinkle chopped pistachios on top or add some fresh berries. You can pop them back in the fridge but the filling will harden to the same consistency as the base, so leave them out to warm to room temperature before eating!


31/03/2014

PEANUT BUTTER BLONDIES

 If it seems like I'm obsessed with the peanut butter and chocolate combo, it's because I am. First came my chocolate peanut butter cups, and now these little squares of goodness (original recipe from Rachel Allen's book 'Bake'). If you're a PB and chocolate fiend like myself, do yourself a favour and bake these. 

INGREDIENTS
125g plain white flour
1 tsp baking powder
100g soft butter
150g crunchy peanut butter
175g light brown sugar
1 egg, beaten
1 tsp vanilla extract
75g chopped white chocolate

METHOD
1. Preheat the oven to 170C. Grease a 20cm x 20cm tin with butter and line the bottom with greaseproof paper.

2. Sift the flour and baking powder into a small bowl and set aside. In a large bowl, cream the butter and peanut butter together until very soft. 

3. Add the sugar, egg and vanilla extract and beat until well combined. Add the flour, baking powder and chopped white chocolate and mix to form a dough. 

4. Spread the dough evenly across the tin and bake in the oven for 25-30 minutes, or until golden brown and almost firm in the centre. Remove from the oven and allow to cool before removing from the tin and cutting into squares.

5. Enjoy with a cup of tea or warmed up with a scoop of homemade vanilla ice cream


24/03/2014

ALMOND AND CINNAMON FRENCH TOAST

I'm a toast lover. Avocado toast, eggs on toast, hummus, you name it. But french toast? That stuff is in a league of it's own. Typically it's made with day old brioche, but when the craving comes, well you gotta work with what you have. Day old fluffy white batch bread from the farmers market does the job pretty darn well. I decided to up the stakes a little and add some extras to the usual recipe, almonds and cinnamon. And damn, it was good.

INGREDIENTS
4 slices of day old bread
2 eggs
1 tbsp vanilla extract
rind of 1 orange
1/4 cup flaked almonds
1 tsp ground cinnamon
1/2 tbsp brown sugar
4 knobs of butter

METHOD
1. Heat your oven to 180C and melt a knob of butter on a non-stick pan on a medium heat.

2. Mix the eggs, vanilla, orange rind, cinnamon and sugar together in a wide, shallow dish. Soak a slice of bread in the mixture for about 7 seconds on either side so it is thoroughly soaked, but not so soggy it will fall apart. Sprinkle a good handful of flaked almonds and some cinnamon over one side of the slice of bread and put in the pan, almond side down. While it's cooking, add almonds and cinnamon to the side facing up. 

3. Adjust the heat so that the bread is heating through and not burning and when the bottom side has dried, flip it. Once cooked through pop it into the oven on a greaseproof baking try to keep warm. 

4. Repeat with the rest of your bread, melting a knob of butter on the pan before each slice. Serve hot with maple syrup, fresh fruit and a big ole' cup of joe.


17/03/2014

RHUBARB CRUMBLE


Crumble is a long standing breakfast, lunch, dinner dessert in my house. Name any fruit, chances are someone in my house has made a crumble with it. They're pretty easy to throw together but yield such a delicious result. This time round, I opted for a rhubarb crumble. Tart fruit with a sweet and crunchy topping, all brought together with a scoop of ice cream. Excuse me while I go get seconds.

INGREDIENTS
FOR THE FRUIT
600g rhubarb
60g sugar

FOR THE CRUMBLE
120g flour
60g butter, softened
25g oats
70g light brown muscovado sugar
30g flaked almonds
30g roughly chopped hazelnuts

METHOD
1. Pre-heat your oven to 180C. Roughly chop up the rhubarb into 2 inch thick pieces. Place the rhubarb and the sugar in a large, lidded pot over a low heat and stew for about ten minutes until the rhubarb chunks are soft. If you might like your rhubarb more tart, add less sugar and taste after the ten minutes. Add as much more as you like. Don't be tempted to leave the rhubarb on the heat for much longer, it will stew further in the oven.

2. Add the flour and chopped up soft butter in a large mixing bowel and rub together until the mixture resembles breadcrumbs. Add the oats and sugar and mix thoroughly.

3. Add the flaked almonds and hazelnuts to the mixture. These are optional, and you can vary the amount depending on your preference. The more you add, the rougher the texture.

4. Pour the rhubarb into an oven proof dish and cover with an even layer of the crumble mixture. Sprinkle another handful of flaked almonds on top. Bake in the oven for between 25-35 minutes, until the crumble is golden brown. Don't worry if the rhubarb bubbles up the sides of the crumble, perfectly normal. 

5. Serve warm with some homemade vanilla ice cream. And then go back for seconds, obviously.


13/03/2014

HOMEMADE VANILLA BEAN ICE CREAM


When it comes to ice cream, I like my intense flavours. That being said, for my first venture into making it myself, I decided to stick to something simple and classic. You can't go wrong with a decent vanilla ice cream, but when made with real vanilla beans and only a handful of other ingredients, the flavour far exceeds anything you can buy in a tub. Dollop on top of warm chocolate cookiespancakes or eat by the spoonful straight out of the jar. I halved the recipe I found here, and loved the tips on how to reuse your vanilla pods.

INGREDIENTS
makes approx. 500ml
125ml (1/2cup) whole milk
75g sugar
1 vanilla bean, split lengthwise
250ml (1 cup) heavy cream*
3 egg yolks
1 tsp pur vanilla extract

*I used double cream, but in future will use regular cream so it won't be as heavy.

METHOD
1. Heat the milk, salt, and sugar in a saucepan. Scrape the seeds from the vanilla bean into the milk with a paring knife, then add the bean pod to the milk. Cover, remove from heat, and infuse for one hour.
2. To make the ice cream, set up an ice bath by placing a 1L bowl in a larger bowl partially filled with ice and water. Set a strainer over the top of the smaller bowl and pour the cream into the bowl.
3. In a separate bowl, stir together the egg yolks. Rewarm the milk then gradually pour some of the milk into the yolks, whisking constantly as you pour. Scrape the warmed yolks and milk back into the saucepan.
4. Cook over low heat, stirring constantly and scraping the bottom with a heat-resistant spatula, until the custard thickens enough to coat the spatula.
5. Strain the custard into the heavy cream. Stir over the ice until cool, add the vanilla extract, then refrigerate to chill thoroughly. Preferably overnight.
6. Remove the vanilla bean and freeze the custard in your ice cream maker according to the manufacturer’s instructions.
Note: Used vanilla beans can be rinsed and dried, then stored in a bin of sugar. That sugar can be used for baking and, of course, for future ice cream making.

10/03/2014

SOFT HAZELNUT CHOCOLATE COOKIES


If you're the type of person to favour crunchy cookies over soft, gooey, melt-in-the-mouth goodness, you better walk away slowly. We're not going to get along very well. This Nigel Slater recipe is just that, and a little bit more too. I've been making these for years, ever since I first discovered the recipe, and I've yet to come across a person who doesn't like them. Easy to whip up a batch, not easy to keep around for long. Just how it should be. 

  • INGREDIENTS
    Makes 12 large cookies

    200g/7oz dark chocolate at least 70% cocoa solids
    75g/3oz butter
    225g/8oz light muscovado sugar
    2 free-range eggs
    1tsp vanilla extract
    25g/1oz skinned hazelnuts
    25g/1oz ground almonds
    150g/5¼oz self-raising flour

  • METHOD
  • 1. Preheat the oven to 180C/350F/Gas 4. 

    2. Snap the chocolate into pieces in a small heatproof glass bowl. Place the bowl over a small pan
    of simmering water, with the base of the bowl not quite touching the water. Allow the chocolate to melt. Don't be tempted to stir it, other than to occasionally push any unmelted chocolate down into the liquid chocolate to encourage it to melt. Turn off the heat as soon as the chocolate has melted.
  • 3. Cream the butter and sugar together in a food processor until smooth and creamy. Break the eggs and vanilla extract in a small bowl or jug, whisk just enough to break up the eggs, then add the mixture gradually to the butter and sugar, beating constantly. It is worth scraping down the sides of the bowl with a rubber spatula from time to time to ensure a thorough mixing. Add the melted chocolate and continue to mix.
  • 4. Toast the hazelnuts in a shallow pan until golden, shaking regularly so they colour evenly. Pour the hazelnuts onto a clean tea towel or kitchen roll and rub to remove the skins. Chop up roughly and add to the mixture, along with the flour and ground almonds.
  • 5. Place large, heaped tablespoons of the mixture on to a baking tray lined with baking parchment. You should get twelve large biscuits. The mixture is fine to sit for a few minutes if you are cooking them in two batches. Don't be tempted to flatten the cookies, they will do so in the oven anyway.
  • 6. Bake the cookies for 9-10 minutes. The cookies will have spread and be very soft to the touch. Remove them from the oven and set aside to cool a little. As soon as they are cool enough to move without breaking, slide a palette knife underneath and carefully lift them onto a cooling rack.

07/03/2014

CHOCOLATE COVERED FROZEN BANANAS


I've seen the concept of frozen bananas as a replacement for ice cream floating around recently, so I decided to give it a whirl. Nothing to it, really. I cut a banana in half, stuck each half on a skewer and froze them for a few hours. Once they were hard enough (pun not intended), i dipped them into melted dark chocolate and sprinkled with shredded coconut and chopped walnuts. 
Let's be honest, frozen bananas don't taste a bit like ice cream. That said, these do make a nice little dessert as long as you're not trying so satisfy any good ole Ben and Jerry's cravings. We must also address their appearance.. The term 'phallic' was thrown around a few times in this household. Moral of the story, kids? Don't expect your boyfriend to eat them, he may feel a little uncomfortable.

03/03/2014

PANCAKE PREP: HOMEMADE NUTELLA


Growing up in an uber healthy household, Pancake Tuesday was always a day to get seriously excited about. One thing I always wished could accompany my pancakes, or crumpets (always Darina Allen's recipe, I couldn't find it online so I copied it out below), was Nutella. Fast forward ten years and I decided to make my own. I found the recipe over on Food 52, altered the chocolate ratio slightly, and it didn't disappoint. I was in two minds whether to go for a healthier, two ingredient Nutella (hazelnuts and dark chocolate), or this recipe which is far from healthy. My inner fat kid clearly made the decision on this one..


NUTELLA INGREDIENTS
1 1/4 cup hazelnuts, roasted and peeled
40g milk chocolate, chopped
180g dark chocolate, chopped
tablespoons heavy cream
tablespoon butter, softened
tablespoon unsweetened cocoa powder
tablespoons confectionery sugar
1/2 teaspoon salt
1/2 teaspoon vanilla extract
1/8 teaspoon almond extract


NUTELLA METHOD
1. Preheat oven to 180° C. Spread the hazelnuts out on a baking sheet and roast for 15 minutes, stirring every 5. When hazelnuts have finished roasting, pour onto a clean tea towel and rub, peeling off the skins. 
2. Blend the skinned hazelnuts in a food processor or blender until they form a thick, smooth paste. This should take approximately 5 minutes. It will be crumbly at first but the crumbs will begin to come together to form a butter. 
3. Add the butter, sugar, cocoa powder, salt, and extract. Continue to blend until smooth (approximately 1 to 2 minutes).
4. Melt together chocolates and heavy cream in a double boiler, until a smooth ganache forms. Remove from heat and let cool for 5 minutes. Once ganache has cooled slightly, add it to the food processor or blender and blend until just combined (around 15 seconds). 
5. Transfer to jars and store in the fridge for up to 1 week. (The nutella will firm up slightly in the fridge, so let it sit out at room temp for approximately 30 minutes to soften the consistency.)

CRUMPETS INGREDIENTS
8 ozs plain white flour
1 oz castor sugar
1/4 teasp salt
1/2 teasp bread soda
1 teasp cream of tartar 
1 oz butter
2 eggs
250 ml milk

METHOD
1. Sieve dry ingredients into a bowl and rub in the butter. 
2. Drop eggs into the centre, add a little of the milk and stir rapidly with a whisk. When half the milk is added, beat until air bubbles rise. Add the remainder of the milk.
3. Drop a good dessertspoonful into a hot pan, and cook until bubbles appear on the top. Flip over and cook until golden on both sides. 
4. Serve immediately with a dollop of homemade nutella, a drizzle of maple syrup and a sprinkling of berries.


26/02/2014

CHOCOLATE WHOOPIE PIES


So before I started trying to eat a little cleaner, I whipped up a batch of these bad boys for Valentine's Day. I was dying to try out a different recipe, but had to stick to some pretty specific guidelines to please the Boy (chocolate, no more, no less), and this is what I came up with. I've had the Hummingbird Bakery book for at least a year now and this is actually the first time I've used it. But the way these turned out, I shall most definitely be going back for more. 

INGREDIENTS
Makes 10-12 pies

FOR THE SPONGE
1 large egg
150g castor sugar
125g plain yoghurt
25ml whole milk
1/4 tsp vanilla essence
75g butter, softened
200g plain flour
80g cocoa powder
3/4 tsp bicarbonate of soda
1/4 tsp baking powder

FOR THE FILLING
110g vanilla marshmallow fluff (I didn't add this because I didn't have any)
85g butter, softened
140g icing sugar  

METHOD
1. Cream the egg and the sugar until pale and fluffy. Pour the yoghurt, milk and vanilla essence into a jug and stir together, then add to the beaten egg and sugar. Add the melted butter and mix in thoroughly on a medium speed.
2. Sift the remaining sponge ingredients together, then add to the creamed mixture in two batches, mixing well on a medium speed after each addition. Place the batter in the fridge to cool and set for 20-30 mins.
3. Meanwhile, preheat the oven to 170°C and line two baking trays with baking parchment.
4. Once the batter has cooled down, spoon it on to the papered trays, dividing the mixture into 20-24 mounds, each 3-5cm in diameter and spaced 2-3cm apart. Bake in the oven for 10-13 minutes or until springy to the touch. Remove from the trays and place on a wire rack, allowing them to cool completely before sandwiching together.
5. While the sponges are cooking, you can make the filling. Mix the butter adding in the icing sugar slowly on a low speed until well blended. Add the marshmallow fluff, and lightly mix it in, then increase the speed to high and continue mixing until light and fluffy. Place in the fridge for about 30 minutes to firm up slightly.
6. Assemble the whoopie pies: slap on about 1 tablespoon of icing over the flat side of the whoopie pie and stick on another sponge, making a sandwich.

25/02/2014

PEAR AND HONEY MUFFINS


I'm all for eating healthy, but there's no way I'm kicking my cupcake to the curb in favour of some carrot sticks. Hell no. I don't care what the health benefits are, if it's not tasty, I'm not eating it. On the other hand, if you give me something that tastes as good as the real thing, but is a hell of a lot better for me, then I'm a happy girl. That's where these babies come in. I originally saw the recipe on Madeleine Shaw's website, the queen of all things healthy (#gettheglow)Grain free and dairy free, these are just full of good stuff. And damn, they are good.

INGREDIENTS
300g ground almonds
1 tsp baking soda
A pinch of salt
1 1/2 tsp nutmeg
2 tsp cinnamon
50g coconut oil
3 eggs
50g honey
1 vanilla bean or 1 tbsp vanilla bean paste
3 pears

METHOD
1. Preheat oven to 180ºC and prepare a cupcake tin with 9-12 cases.
2. Mix the almonds, spices, salt and baking powder in a bowl. 
3. Combine the rest of the ingredients, except the pears, and then slowly add in the dry ingredients.
4. Slice the pears into 1/2 cm strips (remove the seeds and core).
5. Place some of the pear slices into the cases, add some cake batter then add another layer of pear and fill the container with the cake batter.
6. Complete this with the rest of the mix.
7. Bake for 16-20 minutes or until the tops are golden brown, then remove and allow to cool. Once cooled remove them from the tins and flip them over.


24/02/2014

HEALTHY(ER) PEANUT BUTTER CUPS


No matter how healthy I am trying to be, I'll still be treating myself to something nice at the weekend. Given my current obsession with minimising unneccessary additional ingredients, however, I decided to take my original peanut butter cup recipe and cut it down to only two ingredients. Yes, two. Ridiculously simple, ridiculously good. 

INGREDIENTS
200g good quality dark chocolate
approx. 1/2 cup 100% peanut butter

METHOD
1. Line a mini cupcake tin with cases.
2. Melt the chocolate in a bain-marie.
3. Add about one teaspoon of melted chocolate to each cupcake case and throw in the fridge until the chocolate has hardened (about 10 minutes).
4. Add one teaspoon of peanut butter to each case and flatten and return to fridge for another 10 minutes.
5. Add one or two teaspoons of chocolate to the case so that the peanut butter is covered completely. Return to the fridge for about twenty minutes or until the chocolate has hardened.
6. Try and eat only one.. yeah right.


21/02/2014

HOMEMADE NAKD BARS


I have a serious sweet tooth so dessert has always been a daily thing for me, none of this saving for the weekend business. Breakouts and bloating galore due to my lack of portion control, (why have one when you can have five), I finally decided to cut out all chocolate during the week and crowd in healthier options. I had heard of Nakd bars before, but they never really appealed to me. When I saw the list of ingredients though, the first thing that popped into my head was how easy they would be to make at home. Raw, vegan, gluten free but a seriously chocolate-y flavour, you can't go wrong. Take it from me, these are damn good.

INGREDIENTS
makes 8 large bars/16 squares
1 cup of medjool dates
1/2 cup of whole almonds
1/2 cup of ground almonds
1/4 cup of raw cacao (or substitute with cocoa powder)
1/4 cup of sultanas
rind of 2 oranges
tablespoon of water/freshly squeezed orange juice (optional)

METHOD
1. Throw everything into a food processor and whiz to your heart's content.
2. Compress into a lined baking tin and put in fridge to cool.
3. Pop out of tin and cut into desired size chunks. 

Simples.


01/11/2011

HOMEMADE PEANUT BUTTER CUPS


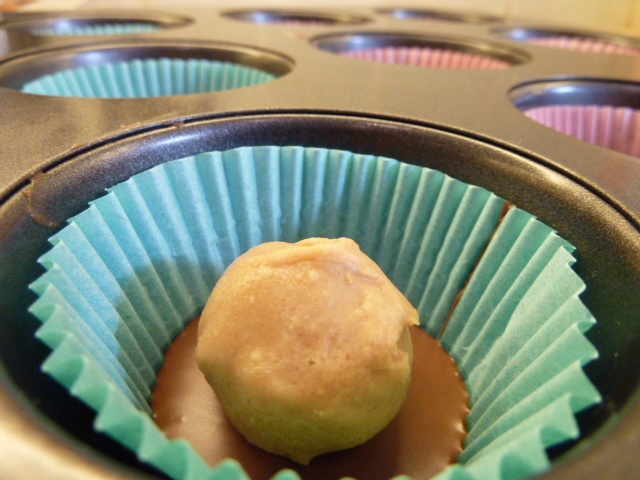
Having recently discovered Reese's Peanut Butter Cups, which only in the past year have been available here in Ireland, they have quickly become my new favorite treat. The only downside is the not so great quality chocolate, so I decided it was high time to try and make some at home. The end result was so much better than expected, they truly are delicious.

Peanut Butter Cups
Makes 18

325g milk chocolate (you can split it with dark chocolate for a richer flavour)
1/2 cup peanut butter (I used smooth, but will use crunchy in the future for texture)
1/8 cup (28g) butter
1/8 cup light muscovado sugar
2/3 cup icing sugar

Line a mini-muffin tin with paper liners and set aside. Line a baking tray with baking parchment and set aside

In a medium saucepan, combine the peanut butter, butter and brown sugar over medium heat. Heat until completely melted and starting to bubble a little, stirring constantly. Remove from the heat. Add the icing sugar a ¼ cup at a time, stirring until completely combined with the peanut butter mixture after each addition. Set aside and let cool

Melt the chocolate in a heatproof bowl in the microwave

Spoon melted chocolate into the bottom of each lined muffin cup. Place a peanut butter patty on top of each chocolate-lined muffin tin. Then use a scoop or spoon to add more melted chocolate on top and around each peanut butter patty. (If the melted chocolate firmed up, just pop it back into the microwave for 30 seconds or so to re-melt)

Use a heaping teaspoon to scoop out the peanut butter mixture. Roll it into a ball, and then flatten it slightly into a disk. Place on the prepared baking sheet lined with parchment paper. Once finished with all of the peanut butter mixture, refrigerate both the muffin tins and the peanut butter patties for about 30 minutes
Refrigerate again for 30 minutes, then they’re ready to serve! Store in the refrigerator or freezer. You can keep at room temperature in an airtight container if you’re going to serve them the same day, but they’ll start to get soft if not at cool room temperature