04/06/2014

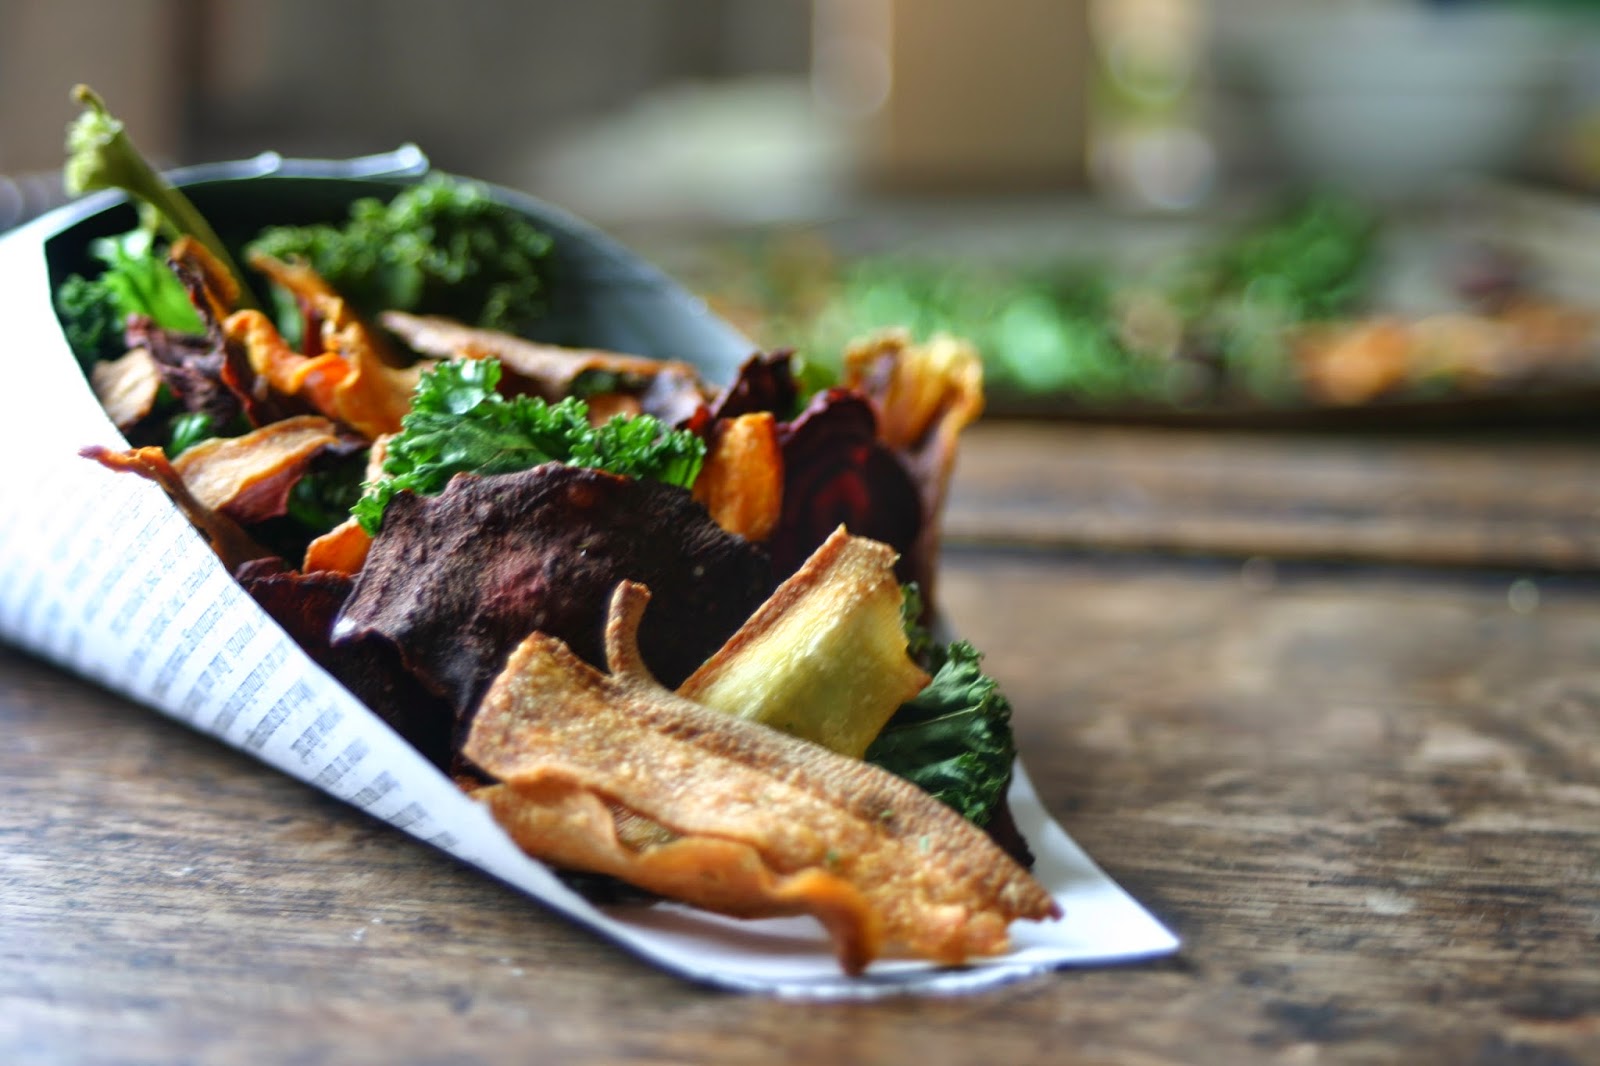
HOMEMADE VEGETABLE CRISPS

I had been wanting to try my hand at homemade vegetable crisps for a while now, but was waiting until I got my hands on a mandolin. That time never came so I settled for a cheese slicer, which made a pretty good alternative. I've tried store bought vegetable crisps plenty of times and loved them, but never thought that my homemade version would live up to them. Well, I was wrong.  (Apart from the kale, not my cup of tea. At all.) 

INGREDIENTS
yields one large bowl of crisps
1 large carrot
1 large parsnip
1 beetroot
bunch of kale leaves
olive oil
sea salt
chilli flakes

METHOD
1. Preheat the oven to 200C. Wash the kale and peel the carrot, parsnip and beetroot. Using a mandolin, sharp knife or peeler/cheese slicer, cut the carrot, parsnip and beetroot into paper thin slices. Keep them as big as possible, cutting the carrot and parsnip length-ways.

2. Dry off the slices of all vegetables as much as possible using kitchen paper. If they're damp at all they will take much longer to get crispy in the oven. Once all the moisture has been absorbed, coat the slices in the tiniest bit of olive oil. I'm talking 1/4 tsp per vegetable.

3. Lay the crisps out on an unlined baking tray and sprinkle with salt and chilli flakes to taste. Try to keep the crisps separated and they'll crisp up better.

4. Pop in the oven and give them all a shake every 5 minutes. I found that the cooking time really varied (anywhere from 8-30 minutes) depending on the thickness of the crisps and their moisture when going into the oven. Just keep checking them until they're perfect.

14/05/2014

RAW CACAO & COCONUT TARTS

I can eat nothing but fruit and vegetables for breakfast, lunch and dinner and be perfectly satisfied, but those chocolate cravings never disappear. I struggle to find healthy, yummy desserts so when I happened upon this recipe over on Madeleine Shaw's blog, I couldn't make it fast enough. One small problem; if you don't like the flavour of coconut, step away now, this is not the answer to your prayers. If I'm honest, I wasn't blown away by these when I first tried them. After adding some chopped up strawberries to them, though? Delicious. The best bit? They're so rich that only a couple of bites satisfies all cravings. Win, win.

INGREDIENTS
makes 4 10cm tarts

BASE
75g ground almonds
25g desiccated coconut
25g dates
2 heaped tbsp raw cacao powder
1 tbsp melted coconut oil
a drop of vanilla extract
1 tsp stevia (adjust to taste)

FILLING
100g soaked cashews
15g slightly melted coconut oil
3 tbsp honey
1 tbsp raw cacao paper
1-2 tbsp stevia (adjust to taste)
A drop of water

TOPPING
A handful of chopped pistachios
Raspberries / blueberries / strawberries

METHOD
1. First, grab your tins and oil them up with a little bit of melted coconut oil. Leave the cashews to soak in a bowl of water.

2. Pop the ground almonds, desiccated coconut, dates, cacao powder and stevia into a food processor and blend for a couple of minutes. Add the melted coconut oil slowly and blend until combined completely with the rest of the ingredients. Add the base to the tins gradually, a spoonful at a time. Press the mixture into the tin on the base and along the edges. Make sure to divide the mixture evenly between the desired amount of tins. Put the tins into the fridge to set the base while you make the filling.

3. Blend the soaked cashews, honey, stevia and water in the food processor. Add the cacao and coconut oil and blend until fully combined and creamy. This might take at least a few minutes, and make sure to scrape down the sides and the bottom of the food processor to make sure everything is combined. Add more stevia or honey to taste.

4. Add the filling to the tins with a spoon or spatula. Sprinkle chopped pistachios on top or add some fresh berries. You can pop them back in the fridge but the filling will harden to the same consistency as the base, so leave them out to warm to room temperature before eating!


17/03/2014

RHUBARB CRUMBLE


Crumble is a long standing breakfast, lunch, dinner dessert in my house. Name any fruit, chances are someone in my house has made a crumble with it. They're pretty easy to throw together but yield such a delicious result. This time round, I opted for a rhubarb crumble. Tart fruit with a sweet and crunchy topping, all brought together with a scoop of ice cream. Excuse me while I go get seconds.

INGREDIENTS
FOR THE FRUIT
600g rhubarb
60g sugar

FOR THE CRUMBLE
120g flour
60g butter, softened
25g oats
70g light brown muscovado sugar
30g flaked almonds
30g roughly chopped hazelnuts

METHOD
1. Pre-heat your oven to 180C. Roughly chop up the rhubarb into 2 inch thick pieces. Place the rhubarb and the sugar in a large, lidded pot over a low heat and stew for about ten minutes until the rhubarb chunks are soft. If you might like your rhubarb more tart, add less sugar and taste after the ten minutes. Add as much more as you like. Don't be tempted to leave the rhubarb on the heat for much longer, it will stew further in the oven.

2. Add the flour and chopped up soft butter in a large mixing bowel and rub together until the mixture resembles breadcrumbs. Add the oats and sugar and mix thoroughly.

3. Add the flaked almonds and hazelnuts to the mixture. These are optional, and you can vary the amount depending on your preference. The more you add, the rougher the texture.

4. Pour the rhubarb into an oven proof dish and cover with an even layer of the crumble mixture. Sprinkle another handful of flaked almonds on top. Bake in the oven for between 25-35 minutes, until the crumble is golden brown. Don't worry if the rhubarb bubbles up the sides of the crumble, perfectly normal. 

5. Serve warm with some homemade vanilla ice cream. And then go back for seconds, obviously.


25/02/2014

PEAR AND HONEY MUFFINS


I'm all for eating healthy, but there's no way I'm kicking my cupcake to the curb in favour of some carrot sticks. Hell no. I don't care what the health benefits are, if it's not tasty, I'm not eating it. On the other hand, if you give me something that tastes as good as the real thing, but is a hell of a lot better for me, then I'm a happy girl. That's where these babies come in. I originally saw the recipe on Madeleine Shaw's website, the queen of all things healthy (#gettheglow)Grain free and dairy free, these are just full of good stuff. And damn, they are good.

INGREDIENTS
300g ground almonds
1 tsp baking soda
A pinch of salt
1 1/2 tsp nutmeg
2 tsp cinnamon
50g coconut oil
3 eggs
50g honey
1 vanilla bean or 1 tbsp vanilla bean paste
3 pears

METHOD
1. Preheat oven to 180ÂșC and prepare a cupcake tin with 9-12 cases.
2. Mix the almonds, spices, salt and baking powder in a bowl. 
3. Combine the rest of the ingredients, except the pears, and then slowly add in the dry ingredients.
4. Slice the pears into 1/2 cm strips (remove the seeds and core).
5. Place some of the pear slices into the cases, add some cake batter then add another layer of pear and fill the container with the cake batter.
6. Complete this with the rest of the mix.
7. Bake for 16-20 minutes or until the tops are golden brown, then remove and allow to cool. Once cooled remove them from the tins and flip them over.


21/02/2014

HOMEMADE NAKD BARS


I have a serious sweet tooth so dessert has always been a daily thing for me, none of this saving for the weekend business. Breakouts and bloating galore due to my lack of portion control, (why have one when you can have five), I finally decided to cut out all chocolate during the week and crowd in healthier options. I had heard of Nakd bars before, but they never really appealed to me. When I saw the list of ingredients though, the first thing that popped into my head was how easy they would be to make at home. Raw, vegan, gluten free but a seriously chocolate-y flavour, you can't go wrong. Take it from me, these are damn good.

INGREDIENTS
makes 8 large bars/16 squares
1 cup of medjool dates
1/2 cup of whole almonds
1/2 cup of ground almonds
1/4 cup of raw cacao (or substitute with cocoa powder)
1/4 cup of sultanas
rind of 2 oranges
tablespoon of water/freshly squeezed orange juice (optional)

METHOD
1. Throw everything into a food processor and whiz to your heart's content.
2. Compress into a lined baking tin and put in fridge to cool.
3. Pop out of tin and cut into desired size chunks. 

Simples.